Asiga Composer 2.0.X
The updated version of Asiga composer 2 (version from 2.0.2) is now available for free download for all Asiga users. At startup, the composer is available in 3 theme choices, White, Black and Classic. The choices can be changed afterwards to the other theme than you initially chose.
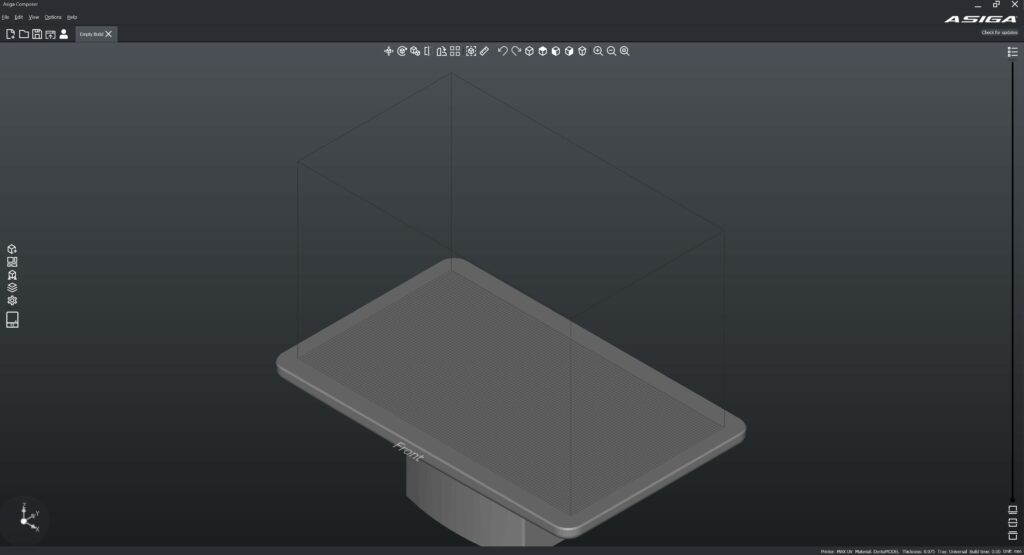
DARK
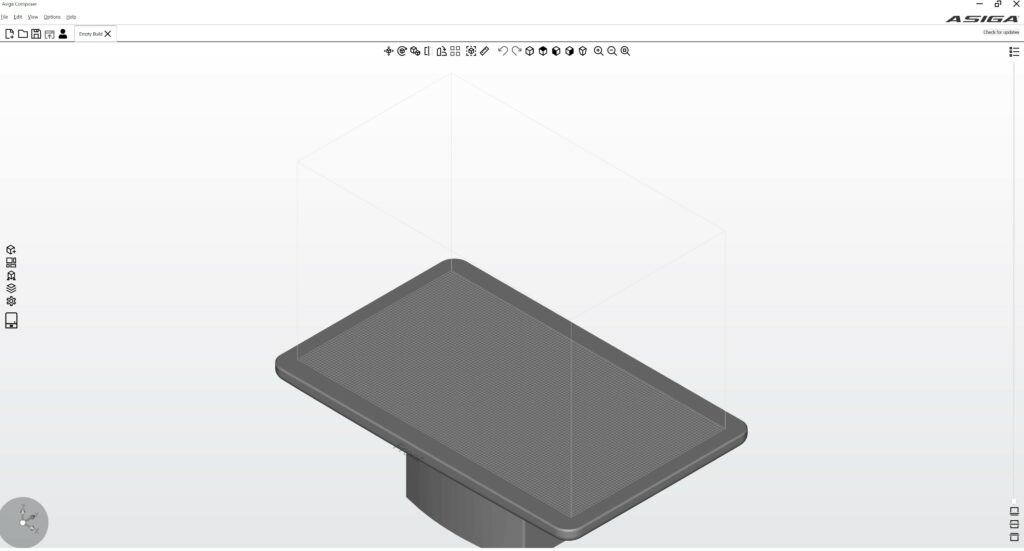
WHITE
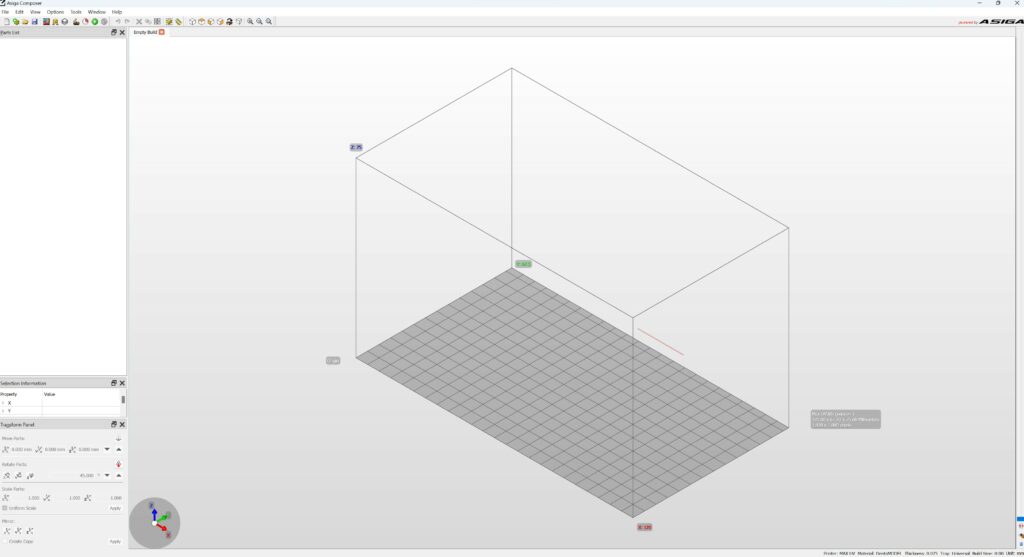
CLASSIC
Changing the Asiga Composer software Theme in composer 2.0.2 +
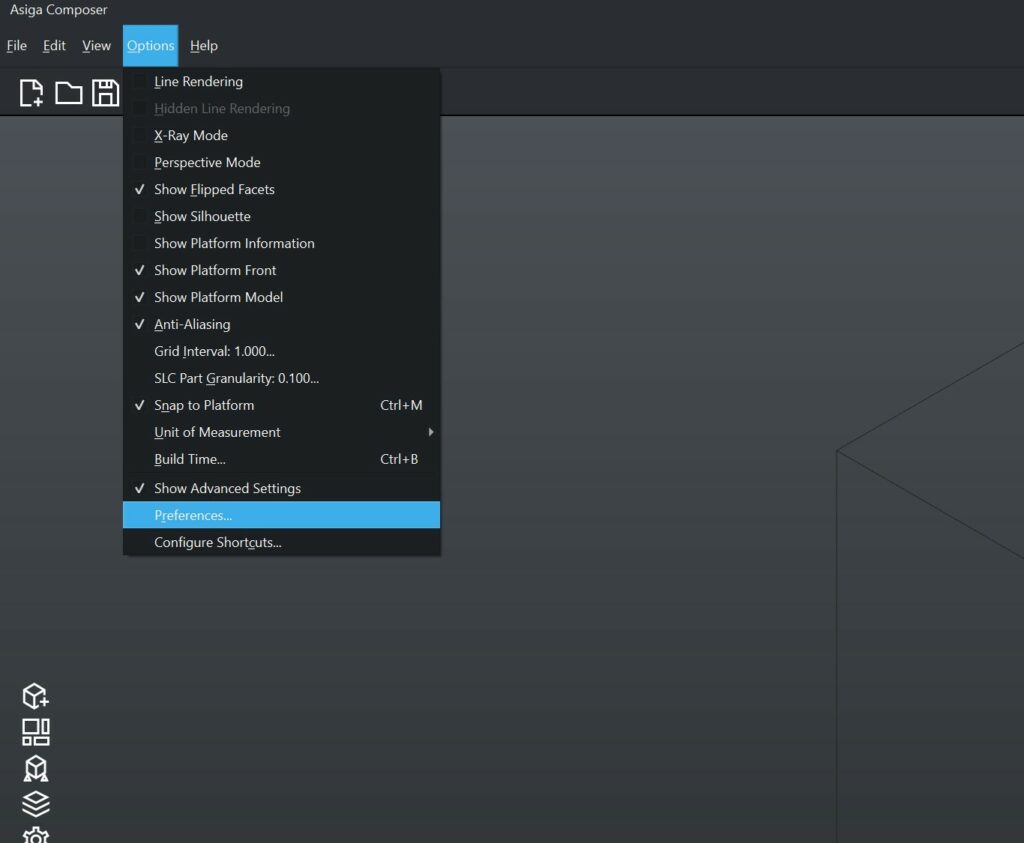
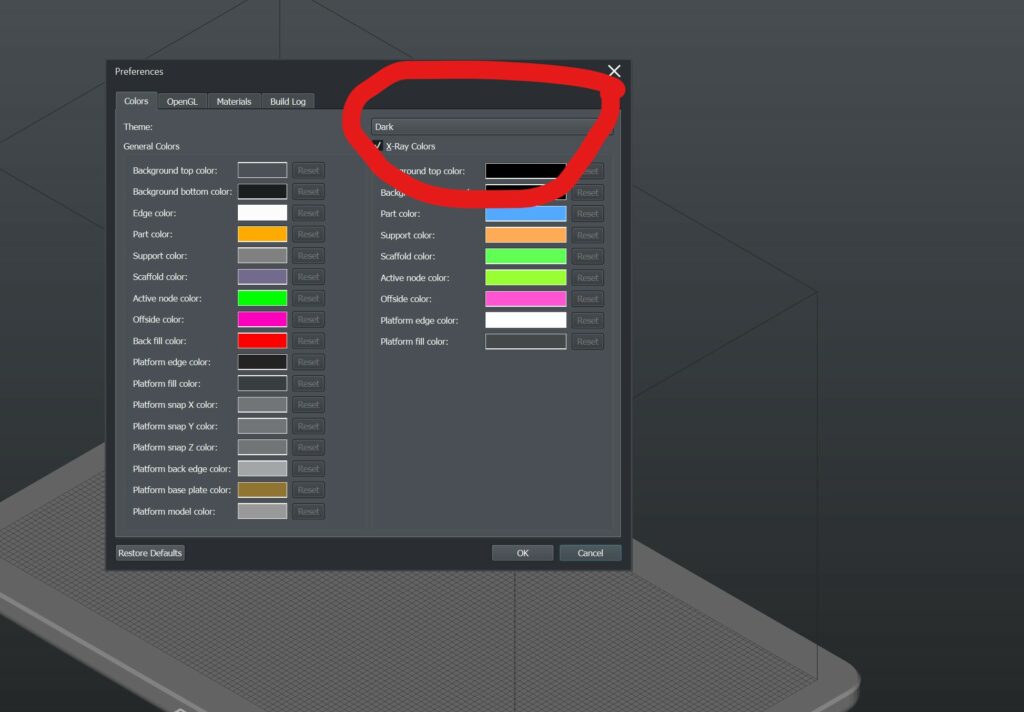
The Themes Dark, White and classic can also be changed afterwards. To do this, start Asiga Composer software. Then in the banner at the top select Options and then at the bottom Preferences…
When the new screen opens you can choose another theme at the right side at the arrow down and your current theme (dark, white or classic). The Asiga Composer needs to be restarted and the version has been switched.
Change thema -> Options -> Preferences...
Cleaning the Asiga Max Build Tray
The video below gives a simple overview of the cleaning of the Asiga Max material bin. This resin tray of the Asiga Max can be cleaned quickly and easily using the LED projector. It may happen that due to the breaking of, for example, support material or part of a printed form, a part breaks off during printing. The cured parts of plastic then end up in the liquid. Print material stuck to the bottom of the resin tray can also cause problems.
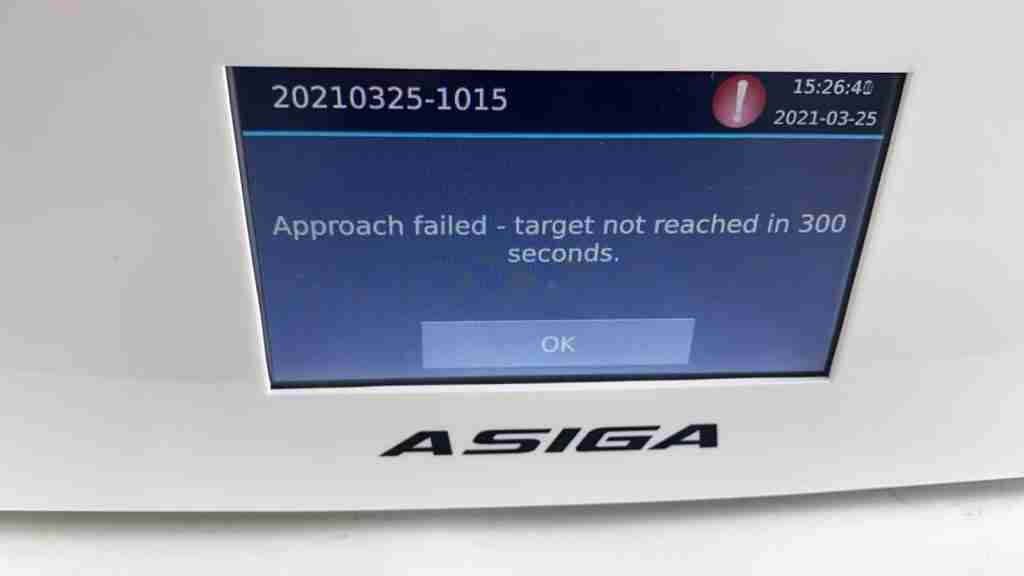
In both cases, the error massage ” Approach failed – Target not reached in 300 seconds.” appear on the PLC control panel of the printer. This message indicates that the Z-axis is unable to reach the target position and after 300 seconds of trying to reach this position, it will stop after 300 seconds for safety reasons. This prevents further damage and problems. This message can also occur on the other Asiga 3D printers such as the Asiga Pro 4K.
In addition to filtering the liquid through, for example, a paint filter, you can also use the LED to stick the hard particles to a print layer. The hard pieces must be on the bottom. The video below shows that you can cure this together with the LED projector. The LED projector can be operated by going to Control Panel in the PLC screen. Then choose the option LED and Start. The LED can stay on for about 20-30 seconds and then turn off. You can then remove the paste that has been made with the supplied transparent cards or business cards. If the bottom of the tray needs to be touched, always wear clean gloves. Do not place fingers on the bottom of the tray.
Control Panel -> LED -> START
Calibration Z-axis, Position Calibration.
Calibration of the Z-axis is very important for the quality and stability of the printer. This calibration should be performed when problems arise in print quality, print quality decreases (particularly in the layer build-up) and when the print time increases significantly. Calibration is quick and easy, but it must be done properly. We do recommend that you always check the calibration and reset the Position encoders to zero after calibrating the Z-axis. You also calibrate the position encoders with this. You can also repeat the Zero Position encoders several times in between without performing the Z-axis calibration.
Watch the video below to perform the zero position calibration for a step-by-step explanation.
Asiga 3D printers maintenance free? Still maintenance!
The Asiga printers are maintenance and license free! That means no extra costs for these machines. However, a certain amount of preventative maintenance is required on the machine to keep it in good condition and the printer to maintain accurate quality.
In principle, we always advise to work extra clean. Basically this happens often and it works well, but in the laboratory environment extreme cleaning is in many cases (almost) impossible. If that is also the case with you, make sure that you clean the machine from dust particles. A lot of dust particles of plastic, gypsum, zirconium and other materials swirl in the air circulation. These often referred to as fine dust particles are nevertheless attracted to the machine by the cooling and heating fans of the Asiga printers. These particles can end up in the machine, causing the quality of the printing to deteriorate, but also, in particular, to damage the working and optical parts of the printer. We therefore strongly advise to place the machines in a clean working environment and to clean these machines from dust. This prevents the fine dust particles from reaching the light projector, on the printed circuit boards and between all electronic connections.
Of course you can also have the machines cleaned and checked by us, then you can also contact us.
Extra attention: place the printers in a dust-free environment and not next to milling machines, plaster rooms or near other grinders.
Training & introduction training
We offer a training & introduction course completely free of charge on all our deliveries of the Asiga 3D printers. This course consists of going through the entire workflow in which we go through the Asiga Composer software, go through the hardware in which we go through the standard calibrations, show a part of the trouble shooting and include the post-processing such as post-hardening and washing of the printed models. . This course is advisable to follow to prevent problems, to work more efficiently, but also to maintain quality.
If there is a change or expansion of people within your organization who will be working with the Asiga printers, we advise you to follow this short introduction again. This can prevent many problems and contribute to the maintenance of the machine and quality. Contact us if you want to repeat the course at your location!

This post provides an overview of some user tips for Asiga Composer, use of Asiga 3D printers and printing materials. This post is regularly updated with new tips.
Asiga Composer Tipsc
Change color
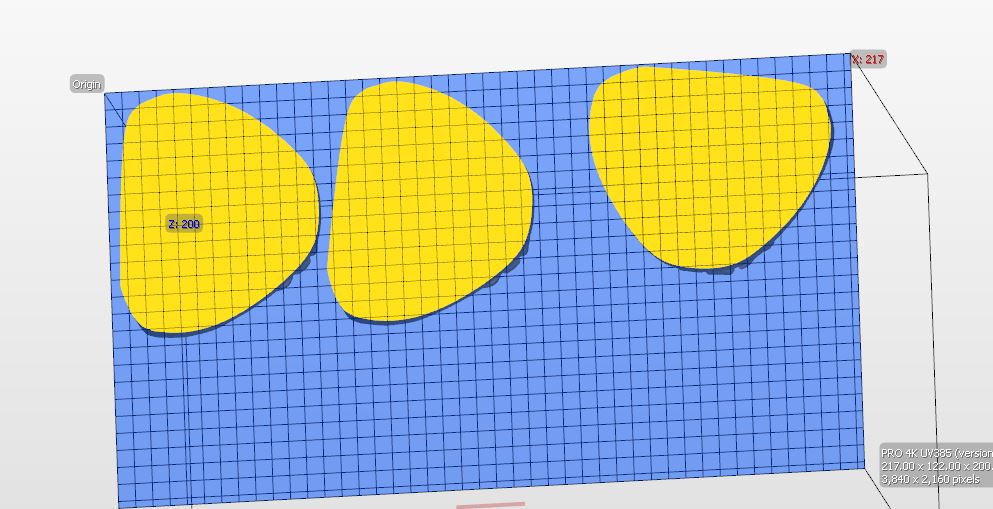
Within Asiga Composer, parts of the working field or objects are displayed in different colors. These colors can be changed according to your wishes. This can help with better positioning or overview when working with Asiga composer to prepare the work for the printer. The photo below is an example of what has changed the background from standard gray to a chosen blue color. Now there is an easier overview of the model that is positioned on the bottom of the (virtual) platform. This helps to work faster and more accurately with Asiga composer. How do you change the color? Select Options and then -> Preferences…. In the tables as in the photo you can choose the color per part for the part you want to change.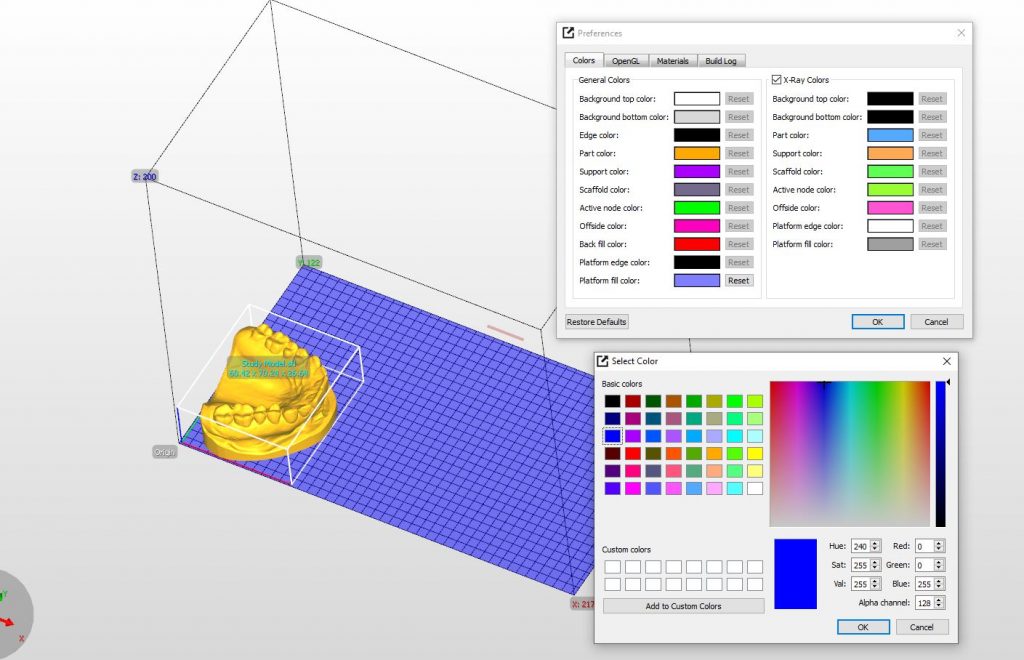
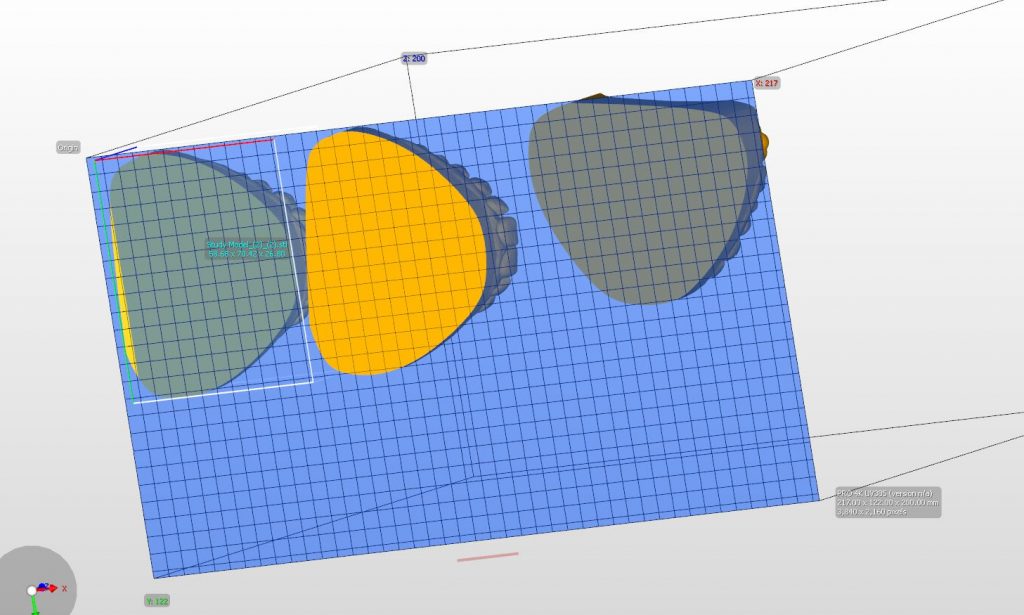
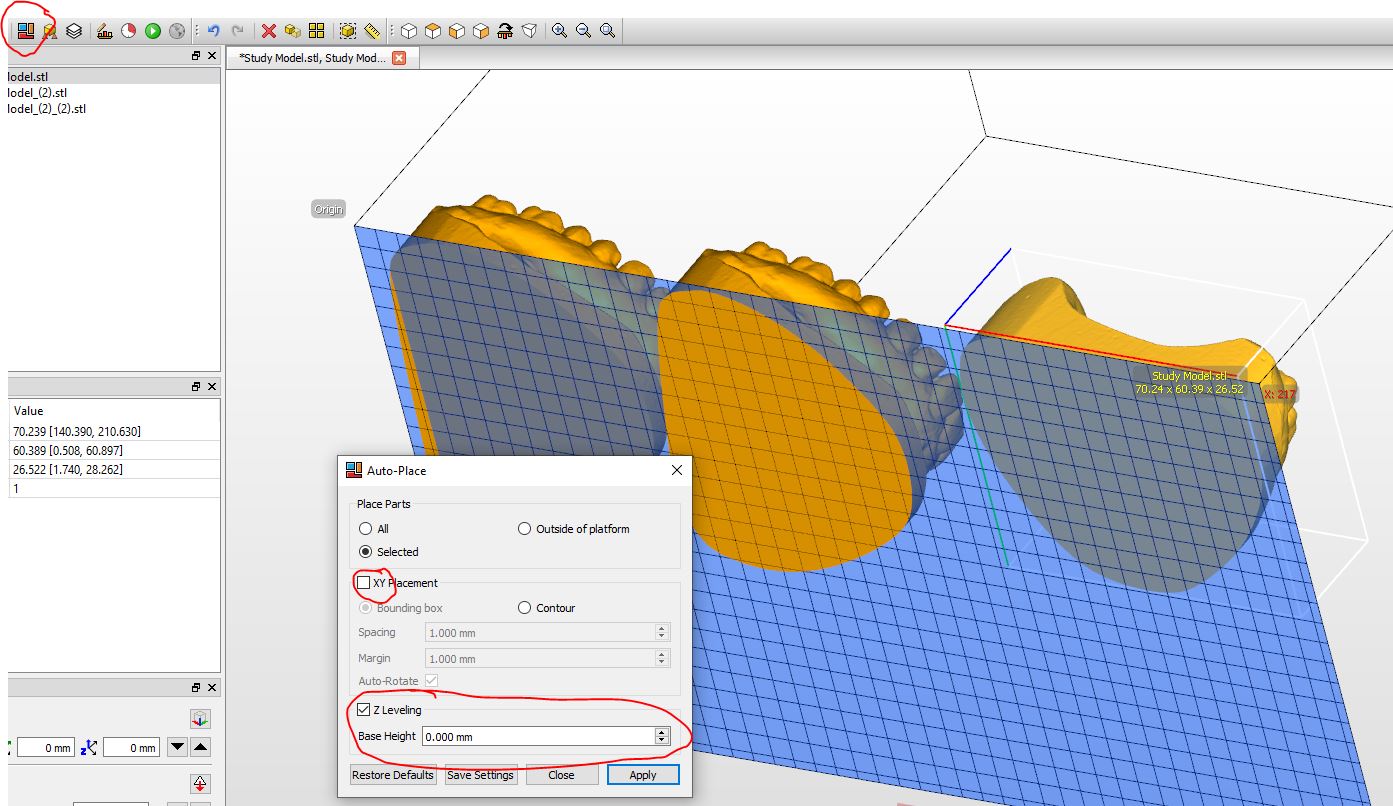
How can the model be placed on the building platform quickly and easily?
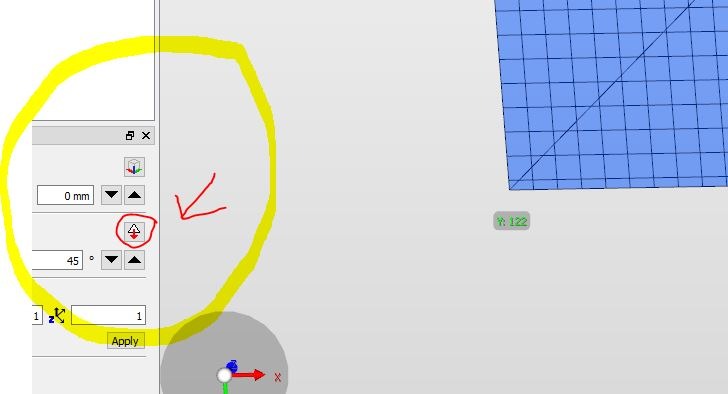
The simple thing is to use the Auto-Place selection button. This icon, which looks like a puzzle piece, opens a program to quickly and easily position the models. When printing directly on the platform, select only the Z-levelling (and thus uncheck the XY-levelling). Choose the distance of the Z-axis at 0.00 mm. This will immediately pull the model downwards. This is only possible for the rightmost model. Model 1, left is too slanted and allows only one piece connection to be obtained. For the left model we first need to change the position so that it is horizontally aligned with the z-axis. For this we use the Rotate Facet Downwards button. Select this button and position the mouse under the bevel of the model. Note that the model must be selected first. Clicking on this will straighten the model. Visually you can see that the model is straightening. Then follow the above steps with the Auto-Place button.Asiga Composer Shortcuts
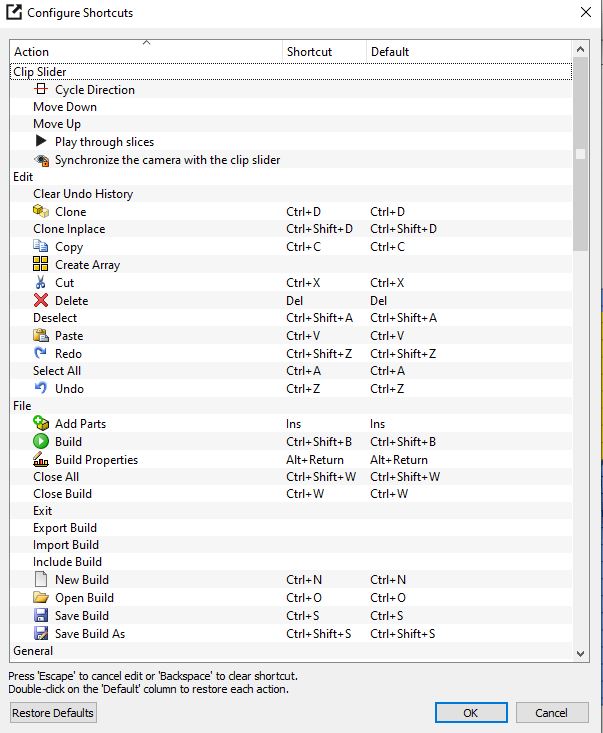
Working with Asiga Composer can be made easier and faster by working with so-called “shortcuts”. These shortcuts have default settings but can also be changed to your own preference. Changing these shortcuts to your liking is easy to set up via the following menu:
Options -> configure shortcuts
Behind each action is a default setting that you can use. In addition to this standard code, you can also define the code yourself. Then click on the code and create your own code.
